Easy way to mailserver (mailcow)
Requirements
Systemressources
| Ressource | mailcow: dockerized requirement |
|---|---|
| CPU | 1 GHz |
| RAM | Minimum 6 GiB + 1 GiB Swap (Standardkonfiguration) |
| Disk Space | 20 GiB (without Emails) |
| Systemtype | x86_64 |
Operating System
We will setup our mailserver on a Debian 12, but you could also use versions 10 or 11. Mailcow also supports Ubuntu and CentOS. For more informations about those please have a look at the official website.
Firewall
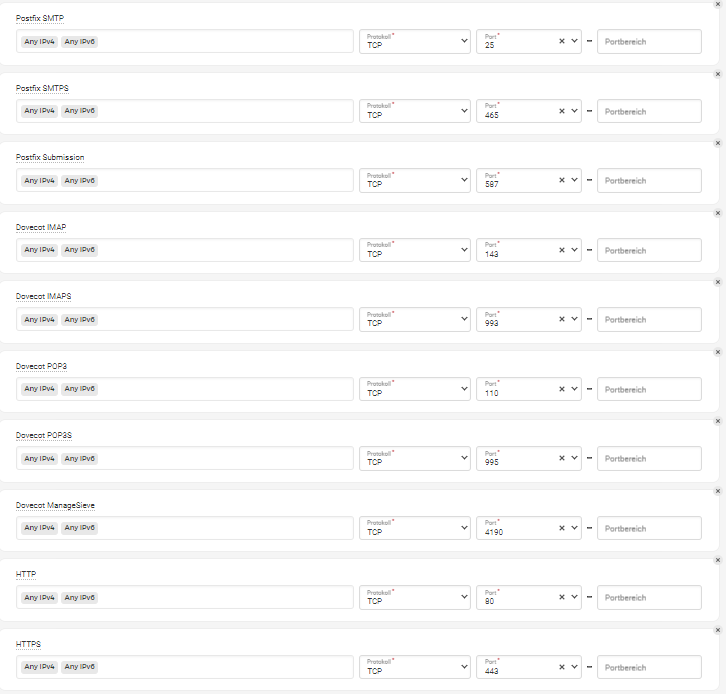
| Service | Protocol | Port | Container | Variable |
|---|---|---|---|---|
| Postfix SMTP | TCP | 25 | postfix-mailcow | ${SMTP_PORT} |
| Postfix SMTPS | TCP | 465 | postfix-mailcow | ${SMTPS_PORT} |
| Postfix Submission | TCP | 587 | postfix-mailcow | ${SUBMISSION_PORT} |
| Dovecot IMAP | TCP | 143 | dovecot-mailcow | ${IMAP_PORT} |
| Dovecot IMAPS | TCP | 993 | dovecot-mailcow | ${IMAPS_PORT} |
| Dovecot POP3 | TCP | 110 | dovecot-mailcow | ${POP_PORT} |
| Dovecot POP3S | TCP | 995 | dovecot-mailcow | ${POPS_PORT} |
| Dovecot ManageSieve | TCP | 4190 | dovecot-mailcow | ${SIEVE_PORT} |
| HTTP(S) | TCP | 80/443 | nginx-mailcow | ${HTTP_PORT} / ${HTTPS_PORT} |
It is required to have the above listed ports open for mailcow to work properly. If you have a firewall before your server, you should open these there, as well.
To check if all these ports are open at your server you can execute the following commands.
sudo apt install -y nmap
nmap --open <your-public-ip-address>
The first command will install the nmap software package, which is a port scanner tool. Our second command will list your servers open ports. The resulting list should contain all ports of the firewall table above.
Setup
Buy the cloud vps
For this setup I will go with a server from Hetzner Cloud, as I like the easyness and straight forward way of server creation and network building abilities at their cloud systems.
As the system requirements above state I will go with a server a little above those. In my case, as the mailserver is just an example for this blog post, I will go for the Hetzner Cloud CCX13 dedicated vCPU system. This server comes with 2 dedicated vCPUs, 8 GB RAM, 80GB SSD disk space and 20TB of monthly allowed outbound traffic. This is more than enough ressources for this purpose.
I am adding a static IPv4- and IPv6-address to this server, so we can use the old and new IP-Address system for our setup. Also hetzner gives me the possibility to directly assign an SSH-Key to my vCloud server for better sshd security, which I will add to the system. After this we also have the possibility to create a firewall for this server, where I will only accept Inbound port 22 for now, to be able to SSH to the server for initial configuration.
At Hetzner I am able to give this server a name on creation. This name will automatically be used as hostname for my Debian 12 installation. The hostname you choose on server installation should look similar to this: mx.example.com
Be aware that Hetzner in his cloud environment blocks the ports 25 & 465 by default in their Cloud products. This is due to too much spammer abuse. You are able to request an unblock after being 1 month a customer. You need to provide them a valid reason for this unblock!
Create DNS & Reverse DNS entries to point to your server
Now that our server is setup and running with a plain minimal Debian 12 installation, we should setup our domains dns to point to our new server IP-Addresses, that we can use it to connect to our server.
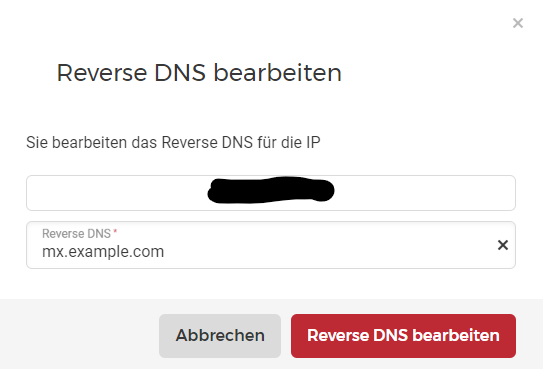
For this I will edit the Reverse DNS at the IPv4 & IPv6 addresses assigned to our server. At Hetzner Cloud you can find these at the “Networking” tab.

We want to change the 2 entries which I marked yellow in the above screenshot to point these IPs to our domain name.

After we edited the reverse DNS successfully, we need to add the Records to point to our IPs also at our Domains DNS. If your domain is registered at Hetzner, you can just go to the DNS Console and add the A record for the IPv4 and the AAAA record for the IPv6 like following.


Now that our DNS & Reverse DNS points to our server IPs, we can use the DNS and our at purchase time added SSH-Keyfile to connect to our server.
Basic server security
As we do not want our mailserver to get hacked, we first should start with basic security configurations of our Debian 12 system.
Securing SSH
Connected to your server with the root user you first should secure your SSH login, as the ssh daemon is reachable from the internet.
nano /etc/ssh/sshd_config
In the opened file, please edit the following settings like shown below. To save the changes press Ctrl+O and to close the editor press Ctrl+X.
Before you restart the sshd service please make sure you setup your authorized_keys SSH-key and executed the next step. The next step is the non-root user creation.
Port 21357
LoginGraceTime 2m
PermitRootLogin no
StrictModes yes
MaxAuthTries 6
PubkeyAuthentication yes
AuthorizedKeysFile      .ssh/authorized_keys
HostbasedAuthentication no
IgnoreRhosts yes
PasswordAuthentication no
PermitEmptyPasswords no
Create a new user & copy authorized_keys to home directory
In the previous step we configured our sshd config file with the recommended settings. Unfortunately we would lock ourself out of the server if we would directly restart the sshd service, as we have forbidden to logon to the server through password & root.
Therefore we now have to create a new user, which will be able to logon via SSH. We can still afterwards work with the root user through privilege escalation in the system. There is absolutley no need to accept root logins via SSH.
So let’s create the new user and copy our SSH-Key to his home directory with the following commands. I will use defency as sample username for this user.
adduser defency
mkdir /home/defency/.ssh
cp ~/.ssh/authorized_keys /home/defency/.ssh
chown -R defency:defency /home/defency/.ssh
chmod 600 /home/defency/.ssh/authorized_keys
Now we can restart the sshd service and check if our login with the new user we created works.
systemctl restart sshd
If you have a firewall in front of your server like I have it, please don’t forget to change the inbound ssh connection to the port we just configured in our sshd_config. Otherwise you will get a “network not reachable” notification from you SSH client. Also make sure your SSH-Key is pasted correctly into the authorized_keys file.
If you did everything correctly, you should now be able to SSH into your server with the newly created user and your SSH key.
Enable sudo for your new user to get administrative access back
As we are now a non privilegde user, we want to get our administrative rights back for this user. To do this we first need to become root again.
su -
After this command, please enter the password for your root user.
Now install the sudo package and assign the sudo group to your unprivileged user.
apt install sudo
usermod -aG sudo defancy
su defancy
groups
exit
We use su and the username to become the user and afterwards check with the groups command if the group was assigned correctly. With exit we are going back to root user again.
If the groups command shows you the group sudo, your user is now able to use sudo command if root privileges are required for a task.
Update && Upgrade your system
If you haven’t done it, relog to your system, as the first user session you have doesn’t have the sudo group assigned to the user and we do not want to execute the following commands as root.
To stay up2date with your system and protect yourself from vulnerabilities in software packages you should regularly update & upgrade your server.
You can do this manually by executing the following commands.
sudo apt update && sudo apt upgrade && sudo apt dist-upgrade
(If there was a kernel update, you should consider a reboot of your system before continuing)
As we always want to have the security updates executed automatically to assure we are always up to date, we want to install and configure a package called unattended-upgrades.
sudo apt install unattended-upgrades && sudo dpkg-reconfigure unattended-upgrades
(At the upcoming questionaire press “yes” to automatically download & update the configured sources)
You are able to customize the automatic updates if you like to but in my experience the default setting is just perfect to stay up to date with most packages. If you like to fine-tune the package you can find the documentation in the official debian wiki.
Server firewall configuration
At our Hetzner Cloud server we already have a firewall in front of our system, which helps that our server only sees traffic we want to have. Mailcow is handling the iptables configuration by itself as stated in their documentation.
“We will change attributes - if necessary - while we enroll the containers automatically, so that everything is secured."
Creating the mailserver with mailcow
Install latest Docker
As mailcow asks you to have the latest version of Docker, we will not use the default packaged debian repo docker but add docker itself to our sources so that we can install the latest version and still have it easy to upgrade if necessary.
To install docker from their own repo we first have to install required packages.
sudo apt update && sudo apt install ca-certificates curl gnupg apt-transport-https
After this we have to download dockers GPG-Key and add the repository to our system.
sudo su -
curl -fsSL https://download.docker.com/linux/debian/gpg | gpg --dearmor -o /usr/share/keyrings/docker.gpg
echo "deb [arch=$(dpkg --print-architecture) signed-by=/usr/share/keyrings/docker.gpg] https://download.docker.com/linux/debian bookworm stable" \
| tee /etc/apt/sources.list.d/docker.list > /dev/null
apt update
exit
Now that we have the docker repo meta information downloaded in our apt package manager, we can install docker from there.
sudo apt install docker-ce docker-ce-cli containerd.io docker-buildx-plugin docker-compose-plugin
sudo systemctl is-active docker
The last command should give you the word “active” as a response.
Install mailcow
Mailcow states in their installation guideline that the installation should be executed with root. Mailcow is handling all exposed applications by giving the right permissions and they are not executing exposed services as root.
To install mailcow we just have to copy the git repository.
sudo su -
apt install git
umask 0022 # <- Check, that this value is 0022
cd /opt
git clone https://github.com/mailcow/mailcow-dockerized
cd mailcow-dockerized
Initialize mailcow
Now after we pulled the docker container from Github, we will initzialize it. This initialization is still executed as root user.
./generate_config.sh
Answer the questionaire of this shell script and it will generate a config file for you.
Update firewall before run to allow mail ports
Update internet firewall
Open the ports at your mail firewall. All port openings are incoming.

Start mailcow
We only need to start the docker container to start our mailserver.
docker compose pull
docker compose up -d
Now you can access mailcow through your browser by accessing your domain (https://${MAILCOW_HOSTNAME}). The default username and password is admin and moohoo. (without the . in the end)
The next stept is the post installation and you should change the password for the admin account immediatly after deployment and it is also recommended to enable 2nd factor authentication with the account.